Hosting a static website on AWS S3 with SSL.
Services we shall be using
- AWS S3
- AWS CloudFront
- AWS Certificate Manager
- A Domain name for the website
- AWS Route53
How does everything pieces together?
Hosting a website generally requires a computing entity, generally an EC2. There whole hustle of making sure that the contents are secure, backed up properly and also are available at all times. S3 allows to host a static website and S3 does the job exactly as well. And the cost of hosting a website on S3 is significantly lower as compared to provisioning an EC2. There are few advantages other than having to pay less as well, naming a few here.
- Low Cost and Scalability — Well, no surprises here. Hosting Images on Amazon S3 gives you the ability to store a large amount of data with a very low cost. With Amazon S3 you only pay for your what you use. While hosting on your own server is expensive and its price is fixed. Whether you use it or not you have to pay for it. You don’t need to worry about the storage space it auto scales and available in abundance.
- Data backup and availability — Hosting Images on Amazon S3 gives you 99.99% availability that will protect your data. Your data will be protected against network and power problems as well as against hardware failure. Plus imagine putting different copies of your images on three servers like amazon s3 does for every image it hosts and you will see that the cost is even more great.
- Security — Data stored in Amazon is secure by default because only owner and bucket have access to Amazon S3 resources. It provides encryption for both secure storage and secure transit.
- Simple Data Transfer — Amazon S3 gives you many options for Cloud Data Migration. It makes is cost effective and so simple to transfer a large amount of data to Amazon S3 or out of Amazon S3.
- Easy to Manage — With Amazon S3, you don’t have to worry about creating the environment for your code to run, dependencies, package upgrades, patches, networking, firewall and all the hassle that a server brings. You just upload your code and S3 will read the index.html page and hosts your website.
Now without much ado, let’s get our hands dirty.
Creating a S3 bucket
- Login into AWS console and navigate to S3.
- Click on Create Bucket.

Provide bucket name as full domain name. Choose Region as you wish.
Block all the public access(we will be configuring this later), enable versioning and create tags as required and click on Create Bucket.
Upload your index.html and all the related files.

Creating a SSL certificate using Certificate Manager
Let’s also create a SSL certificate for our website using AWS Certificate Manager.
- Navigate to Certificate Manager.
- Click on Request a certificate.
- Request a public certificate.
- Add domain names as applicable and click on Next. You can use *.cubedsteps.com as well.

5. Click on DNS validation.
6. You may add tags as applicable.
7. Review your request and click on confirm and request. You can see that the certificate validation is pending.
Creating hosted zones on Route53
- Navigate to Route53 to create a hosted zone.
2. Create a Public Hosted Zone as cubedsteps.com
A hosted zone is a container that holds information about how you want to route traffic for a domain, such as example.com, and its subdomains.
3. Again, go back to Certificate manager and from the drop down on Domain, click on Create record in Route53.
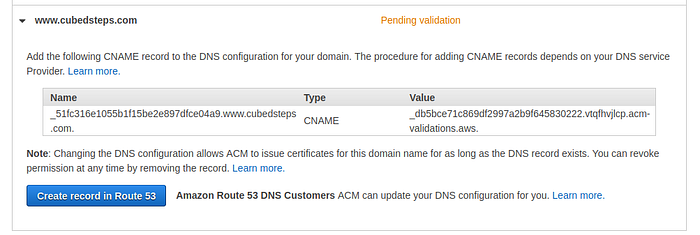
This must be done for all the domains that you requested certificate for.
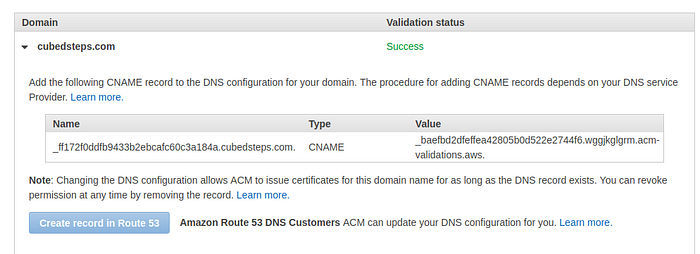
4. After a while you can see that validation status is now successful. If you navigate inside your hosted zone in Route53, you can see that CNAME records have been created for your certificate name.
Creating CloudFront distribution
Now finally, we will be creating a CloudFront distribution as CDN to serve the files in S3. But more importantly, S3 doesn’t have a mechanism to enable SSL on the websites being hosted on. For this reason, we are going to create a CloudFront distribution and attach the SSL certificate to the distribution.
- Navigate to CloudFront service. Click on create distribution right away. Choose Web delivery method.
- While clicking on the origin, you can see your bucket name listed there.
Origin is all the files CDN will distribute. This can be S3 Bucket, EC2 instance or an Application Load Balancer.
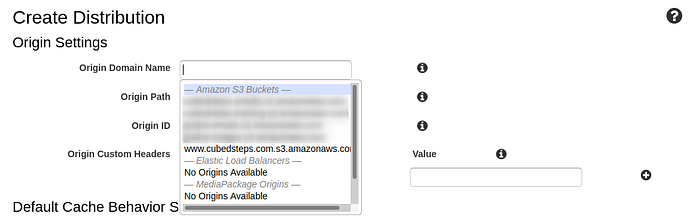
3. Select your bucket name. If you have uploaded your files on root location on S3, leave Origin path blank.
4. Select Restrict Bucket Access, and create a new Origin Access Identity (OAI). You can use the comments as you like. I’ll put cubedsteps-site in my case.
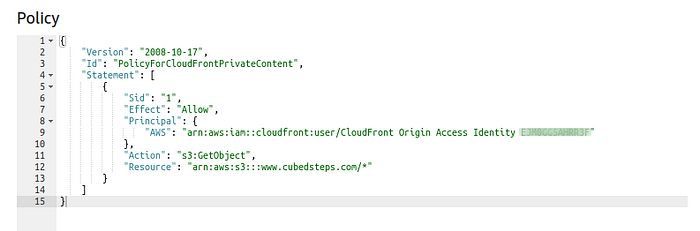
4. Choose to Yes, Update Bucket Policy.

This will allow CloudFront to read the files from S3. You can view the bucket policies in the Permissions section of the bucket.
5. Scrolling down to Default Cache Behavior Settings, select Redirect HTTP to HTTPS. Leave other settings as it is.
6. Scroll down to Distribution settings, the alternate domain name is the field that we would like to supply our custom domain name that we want to use with CloudFront distribution. In my case, I’m providing cubedsteps.com.
7. On SSL Certificate field, you would want to choose Custom SSL Certificate. The certificate that you created previously appears in the box, Select the certificate. Leave all of the settings as they are and click on Create Distribution.

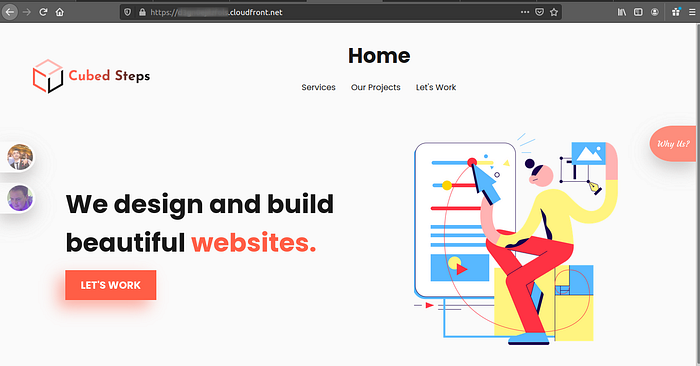
Your distribution may take a while to be available. After the distribution is available, copy the URL from domain name (something.cloudfront.net) on web browser and voila, you should now be able to see your website LIVE.
One last things is to create an Alias record in our hosted zone to point the CloudFront distribution to our website domain name.
- Navigate to Route53.
2. Click on the hosted zone created previously.
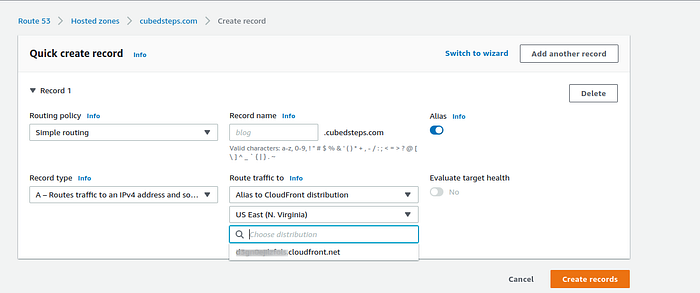
3. Toggle the Alias button. Choose Route traffic to and select Alias to CloudFront Distribution, select the region and your CloudFront distribution should appear. Click on create records. It might take up to 300 seconds to propagate, but your website should now be available.